Posts

Developing a Voting Smart Contract in Solidity using Remix IDE | Blockchain Tutorials

Image
  Photo by Arnaud Jaegers on Unsplash      Hello, so in this tutorial we will be developing the smart contract for voting. Whenever we talk about decentralized applications or dapps, voting is one of the best use cases for it. In centralized voting system there are many issues such as manipulation of votes or system by the authority who has the control. But by the help of blockchain we can bring transparency along with privacy to the voting application.      So lets start with our code, we will understand various sections of our code one by one.  So the first line of code we will be defining the licensing that we will be using for the code. You can make your code free to use or you make your code copyrighted using different license options. // SPDX-License-Identifier: MIT Next we will add the compiler version. This will tell the IDE that on which compiler version we need to compile our code on. Depending on your code or code components ...
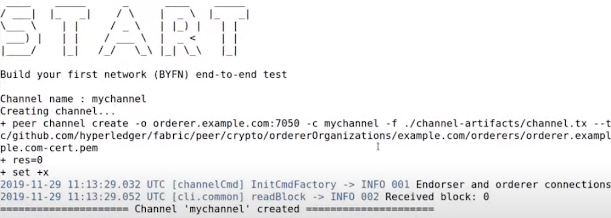
Create and deploy a block chain network using Hyperledger Fabric SDK for Java on Ubuntu 22.04 LTS

Image
Follow these steps to build your first blockchain network using hyperledger fabric sdk for java. Step 1: Check if curl is installed. Command: curl --version Command if not installed: apt install curl Step 2: Check if docker is installed. Command: docker --version Command if not installed: apt install docker.io Step 3: Check if docker-compose is installed Command: docker-compose --version Command if not installed: apt install docker-compose Step 5: Check if go is installed. Command: go version   Command if not installed: apt install golang-go Step 6: Check if nodejs is installed. Command: node –v Command if not installed: apt install nodejs Step 7: Check if npm is installed. Command: npm --version Command if not installed: apt install npm Step 8:   Check if git is installed. Command: git --version Step 4: Check if python is installed. Command: python3 --version Step 9: Configure some git properties. Command: git config ...

Add the sensors to the Robot object and develop the line-following behavior code.

Image
Add the sensors to the Robot object and develop the line-following behavior code - Proteus Simulation Proteus Circuit Design: Components Required: 1) Arduino Uno 2) IR sensors (x2) 3) L298 Motor Controller 4) DC motors (x2) 5) Logic Toggle (x2) 6) Ground 7) Power, DC Link for Libraries: https://drive.google.com/drive/folders/18G4d2w5Sot_XCv7rKVMpC90EIM1FT8_f Code for Circuit: void setup () {   pinMode ( 2 , INPUT ) ;   pinMode ( 3 , INPUT ) ;   pinMode ( 10 , OUTPUT ) ;   pinMode ( 11 , OUTPUT ) ;   pinMode ( 12 , OUTPUT ) ;   pinMode ( 13 , OUTPUT ) ; } void loop () {   int v = digitalRead ( 2 ) ;   int s = digitalRead ( 3 ) ;   if ( v == 1 and s == 1 ){     digitalWrite ( 13 , 1 ) ;     digitalWrite ( 12 , 0 ) ;     digitalWrite ( 11 , 1 ) ;     digitalWrite ( 10 , 0 ) ;   }   if ( v == 1 and s == 0 ){     digitalWrite ( 13 , 0 ) ;     digitalWrite ( 12 , 1 ) ; ...

IoT application that will alert whenever it will be going to rain outside

Image
 IoT application that will alert whenever it will be going to rain outside - Proteus Simulation Proteus Circuit Design: Components Required: 1) Arduino Uno  2) Rain Sensor 3) Virtual Terminal 4) Logic Toggle 5) DC 6) Ground Links for Libraries: https://drive.google.com/drive/folders/18G4d2w5Sot_XCv7rKVMpC90EIM1FT8_f Link for Arduino IDE download: https://www.arduino.cc/en/software Code for Arduino: void setup () {   Serial . begin ( 9600 ) ;   pinMode ( 2 , INPUT ) ; } void loop () {   int rain_sensor = digitalRead ( 2 ) ;   if ( rain_sensor == 1 ){     Serial . println ( "It's raining" ) ;     delay ( 500 ) ;   }   if ( rain_sensor == 0 ){     Serial . println ( "It's not raining" ) ;     delay ( 500 ) ;   } }

IOT application to measure the intensity of light and send feedback

Image
 IOT application to measure the intensity of light and send feedback - Tinker Cad Tinker Cad Circuit Design: Components Required: 1) Arduino Uno R3 2) Breadboard Small 3) Led 4) Photoresistor  5) Multimeter 6) Resistor (x2) Code for the circuit: int sensorvalue = 0; void setup(){   pinMode(A0, INPUT);   Serial.begin(9600);   pinMode(9, OUTPUT); } void loop(){   sensorvalue = analogRead(A0);   Serial.println(sensorvalue);   analogWrite(9, map(sensorvalue, 0, 1023, 0, 255));   delay(100); }

Develop script to test sensors (IR sensor)

Image
Develop script to test sensors (IR sensor) - TinkerCad  Tinker Cad circuit design: Components Required: 1) Arduino Uno R3 2) PIR Sensor 3) Piezo (Buzzer) 4) LED RGB Code for above circuit: int pirsesnor = 0; void setup(){   pinMode(2, INPUT);   pinMode(12, OUTPUT);   pinMode(13, OUTPUT); } void loop(){   pirsesnor = digitalRead(2);   if(pirsesnor == HIGH){     digitalWrite(13, HIGH);     tone(12,500,500);   }   digitalWrite(13, LOW); }

Add pan and tilt service to the robot object.

Image
 Add pan and tilt service to the robot object and test it Tinker Cad Circuit Design: Components Required: 1) Arduino Uno R3 2) Micro Servo (x2) 3) Potentiometer (x2) 250 kilo Ohms 3) Breadboard Small Code for the Circuit: #include <Servo.h> int sensorValue = 0; int outputValue = 0; int sensorValue1 = 0; int outputValue1 = 0; Servo servo_9; Servo servo_7; void setup(){   pinMode(A0, INPUT);   servo_9.attach(9);   pinMode(A1, INPUT);   servo_7.attach(7); } void loop(){   sensorValue = analogRead(A0);   outputValue = map(sensorValue, 0, 1023, 0, 180);   sensorValue1 = analogRead(A1);   outputValue1 = map(sensorValue1, 0, 1023, 0, 180);   servo_9.write(outputValue);   servo_7.write(outputValue1);   delay(10); }

IoT simulation which will record the movement and orientation of phone and give feedback

Image
IoT simulation which will record the movement and  orientation of phone and give feedback in Tinker Cad with code Tinker Cad Circuit Design: Component Requirements: 1) Arduino Uno R3 2) Micro Servo 3) Potentiometer 250 Kilo Ohms Code for the Circuit: #include <Servo.h> #include <SoftwareSerial.h> int pos = 0; int sensorValue = 0; int i = 0; Servo servo_9; void setup(){   servo_9.attach(9);   pinMode(A0, INPUT);   pinMode(13, OUTPUT);   Serial.begin(9600); } void loop(){       sensorValue = analogRead(A0);    pos = map(sensorValue,0,1023,0,180);      for (i = 0; i <= pos; i++) {   if(i == 90){     Serial.println("Landscape");     } else if( i == 180 || i == 0){       Serial.println("Portrait");     }     servo_9.write(i);     delay(15);    }   for (i= pos; i >= 0; i --) {     if(i == 90){     ...

Communication between two embedded devices using UART port with code

Image
 Communication between two embedded devices (Arduino Kit) using UART port with code Components Required: 1) Arduino Uno R3 (x2) 2) Push Button 3) Resistor 220 Ohm 4) Breadboard Mini (x2) 5) Led Code for Circuit: Code for Arduino Uno 3 - connected with push button void setup() {   //set push button pin as input   pinMode(6, INPUT_PULLUP);    //initialize UART with baud rate of 9600 bps   Serial.begin(9600);        } void loop()  {   {   if (digitalRead(6) == HIGH)     {       Serial.write('0');       Serial.println("HIGH");     }   else     {       Serial.write('1');   Serial.println("LOW");     }   }   delay(100); } Code for Arduino Uno 3 - connected with led void setup() {   //set LED pin as output   pinMode(8, OUTPUT);         //initialize UART with baud rate of 9600 bps  ...

Installing Hyper Ledger Fabric on Windows 10

Image
Steps and links used for Installing Hyper Ledger Fabric on Windows 10 Steps for installation: 1 Open power shell in Admin mode. 2 Enable windows SubSystem for Linux dism.exe /online /enable-feature /featurename:Microsoft-Windows-Subsystem-Linux /all /norestart 3 Enable Virtual Machine feature dism.exe /online /enable-feature /featurename:VirtualMachinePlatform /all /norestart 4 Set WSL-2 as default version wsl --set-default-version 2 5 Install Ubuntu app from windows store: Open the Microsoft Store and install Ubuntu 20.04 LTS here 6 Install windows terminal It enables multiple tabs, quickly between the Linux command line and the windows command prompt. 7 Download linux kernel update package: To update the WSL package download setup at the below-mentioned link, it needs admin privilege. https://wslstorestorage.blob.core.windows.net/wslblob/wsl_update_x64.msi 8 Open Windows Terminal and add a new ubuntu tab, you won’t be able to see the ubuntu terminal. Under add new terminal section. 9...