Posts

Building a Login System in Java: JSP, Servlet and JDBC with MySQL

  Building a Login System in Java: JSP, Servlet and JDBC with MySQL Hello, in this tutorial we will build a complete login system using JSP, Servlets and JDBC, running on Apache Tomcat from Eclipse, with MySQL provided by XAMPP. By the end you will have a working app with registration, login, a session-based welcome page and logout. Before the code, here is how the pieces fit together. JSP pages are what the user sees (the forms and messages). Servlets hold the logic (checking the login, saving a new user). JDBC is how Java talks to the MySQL database. If you have used a restaurant, JSP is the menu and the table, the servlet is the chef, and the database is the pantry. What you need JDK installed Eclipse IDE for Enterprise Java and Web Developers Apache Tomcat 10 or above, registered in Eclipse XAMPP (it provides MySQL and phpMyAdmin) MySQL Connector/J (the JDBC driver, downloaded in Step 4) Step 1: Create the database Open the XAMPP Control Panel and click Start nex...

Creating and Running Your First HttpServlet in Eclipse with Tomcat

Image
  Creating and Running Your First HttpServlet Picture Source: Beginnersbook.com Hello, in this tutorial we will build a simple web application using an HttpServlet and run it on Apache Tomcat from Eclipse. By the end you will have a servlet that responds to browser requests with an HTML page, and reads a name from the URL to greet the visitor. Before the code, here is the idea in one line. A servlet is a Java class that receives a request from a browser and sends a response back. Tomcat is the server that listens for those requests and hands them to your servlet. If you have used a restaurant, think of Tomcat as the building that lets customers walk in, and the servlet as the chef who prepares what they ordered. What you need JDK installed Eclipse IDE for Enterprise Java and Web Developers (the plain Java edition does not include the web project wizard) Apache Tomcat 10 or above, extracted to a folder XAMPP Step 1: Register Tomcat in Eclipse Go to Window → Preferences → ...

Developing a Voting Smart Contract in Solidity using Remix IDE | Blockchain Tutorials

Image
  Photo by Arnaud Jaegers on Unsplash      Hello, so in this tutorial we will be developing the smart contract for voting. Whenever we talk about decentralized applications or dapps, voting is one of the best use cases for it. In centralized voting system there are many issues such as manipulation of votes or system by the authority who has the control. But by the help of blockchain we can bring transparency along with privacy to the voting application.      So lets start with our code, we will understand various sections of our code one by one.  So the first line of code we will be defining the licensing that we will be using for the code. You can make your code free to use or you make your code copyrighted using different license options. // SPDX-License-Identifier: MIT Next we will add the compiler version. This will tell the IDE that on which compiler version we need to compile our code on. Depending on your code or code components ...

Create and deploy a block chain network using Hyperledger Fabric SDK for Java on Ubuntu 22.04 LTS

Image
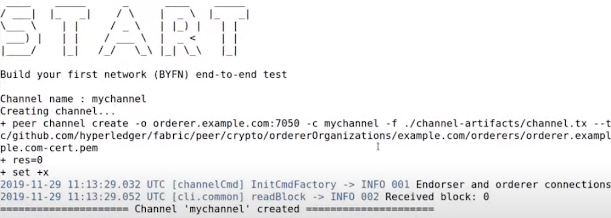
Follow these steps to build your first blockchain network using hyperledger fabric sdk for java. Step 1: Check if curl is installed. Command: curl --version Command if not installed: apt install curl Step 2: Check if docker is installed. Command: docker --version Command if not installed: apt install docker.io Step 3: Check if docker-compose is installed Command: docker-compose --version Command if not installed: apt install docker-compose Step 5: Check if go is installed. Command: go version   Command if not installed: apt install golang-go Step 6: Check if nodejs is installed. Command: node –v Command if not installed: apt install nodejs Step 7: Check if npm is installed. Command: npm --version Command if not installed: apt install npm Step 8:   Check if git is installed. Command: git --version Step 4: Check if python is installed. Command: python3 --version Step 9: Configure some git properties. Command: git config ...

Add the sensors to the Robot object and develop the line-following behavior code.

Image
Add the sensors to the Robot object and develop the line-following behavior code - Proteus Simulation Proteus Circuit Design: Components Required: 1) Arduino Uno 2) IR sensors (x2) 3) L298 Motor Controller 4) DC motors (x2) 5) Logic Toggle (x2) 6) Ground 7) Power, DC Link for Libraries: https://drive.google.com/drive/folders/18G4d2w5Sot_XCv7rKVMpC90EIM1FT8_f Code for Circuit: void setup () {   pinMode ( 2 , INPUT ) ;   pinMode ( 3 , INPUT ) ;   pinMode ( 10 , OUTPUT ) ;   pinMode ( 11 , OUTPUT ) ;   pinMode ( 12 , OUTPUT ) ;   pinMode ( 13 , OUTPUT ) ; } void loop () {   int v = digitalRead ( 2 ) ;   int s = digitalRead ( 3 ) ;   if ( v == 1 and s == 1 ){     digitalWrite ( 13 , 1 ) ;     digitalWrite ( 12 , 0 ) ;     digitalWrite ( 11 , 1 ) ;     digitalWrite ( 10 , 0 ) ;   }   if ( v == 1 and s == 0 ){     digitalWrite ( 13 , 0 ) ;     digitalWrite ( 12 , 1 ) ; ...